An outdoor kitchen works best when it feels like a natural part of your backyard, not a grill placed at the edge of the patio. In Carolina, the right plan should make weeknight meals easier, keep guests close, and account for heat, humidity, rain, and changing seasons from the beginning.
Learn More About a Free Outdoor Kitchen Consultation
The most useful outdoor kitchen ideas start with your cooking and hosting routines. Then connect the grill, prep counter, sink, refrigerator, storage, seating, and weather-ready materials into one practical flow. Planning those relationships early helps you avoid crowded work areas, unnecessary trips indoors, and costly changes later.
Before comparing Bull, Lynx, Big Green Egg, Blackstone, or DCS, look at how people move through the space and how it relates to your home. A clear assessment of utilities, property boundaries, and views from inside can turn inspiration into a kitchen that works every day.
What Should You Plan First in an Outdoor Kitchen?
Short answer: Plan the cooking routine, traffic flow, utilities, views, drainage, and future service needs before choosing appliances or finishes. This order keeps the layout practical and helps your grill, prep space, refrigerator, storage, and seating work together from the start.
Start with the way you want the backyard to work, not with a particular grill or countertop. Think through a typical Saturday: Are you preparing dinner while children play nearby, serving drinks to guests, or cooking while everyone gathers around a fire? The answers will shape the kitchen’s size, seating, storage, and relationship to the rest of the yard.
- Picture the routine: Identify the meals, gatherings, and daily moments the kitchen should support.
- Map movement: Mark the house doors, guest paths, cooking zone, seating, and food-carrying routes.
- Locate utilities: Review gas, electrical, water, drainage, and service access before fixing the footprint.
- Study the setting: Note sun, rain, views from inside, property boundaries, and existing landscaping.
- Choose the package: Select appliances and materials after the working layout is clear.
It also helps to assess the property’s current conditions before choosing a layout. Note existing water access, likely utility routes, property boundaries, drainage, and the location of doors and windows. Oklahoma State University Extension recommends evaluating the landscape’s current condition in relation to what you want to create. That same pre-design mindset can prevent an attractive concept from becoming difficult or expensive to build. Review the pre-design planning worksheet for a useful starting point.
How will the kitchen connect to your home?
Look at the space from inside as well as outside. The kitchen may be visible from a family room, breakfast area, or kitchen window. Consider which views you want to enhance and which equipment, walls, or service areas you would rather screen. A well-placed cooking area can feel like a natural extension of the home instead of a separate island at the edge of the property. It should also support easy movement between indoor and outdoor dining without forcing guests through the cook’s work area.
Where should utilities and traffic flow go?
Map gas, electrical, and water access during the design phase, before the footprint is fixed. Utility planning can affect the location of a grill, sink, refrigerator, lighting, and future additions, so addressing it early reduces rework. Plan clear paths for the cook, guests, and anyone carrying food from the house. The goal is a comfortable route, with enough room around cooking and prep areas to operate equipment safely.
Finally, account for Carolina conditions. Humidity, rain, summer heat, and changing winter temperatures influence placement, shade, drainage, and material choices. A professional 3D design process can show how the proposed kitchen relates to the house and backyard before construction begins. Fun Outdoor Living’s free consultation and 3D design help translate daily routines into a plan that is easier to review, adjust, and build. This is where broad outdoor kitchen ideas become a practical design rather than a collection of disconnected features.
Outdoor Kitchen Ideas That Make Cooking Feel Effortless
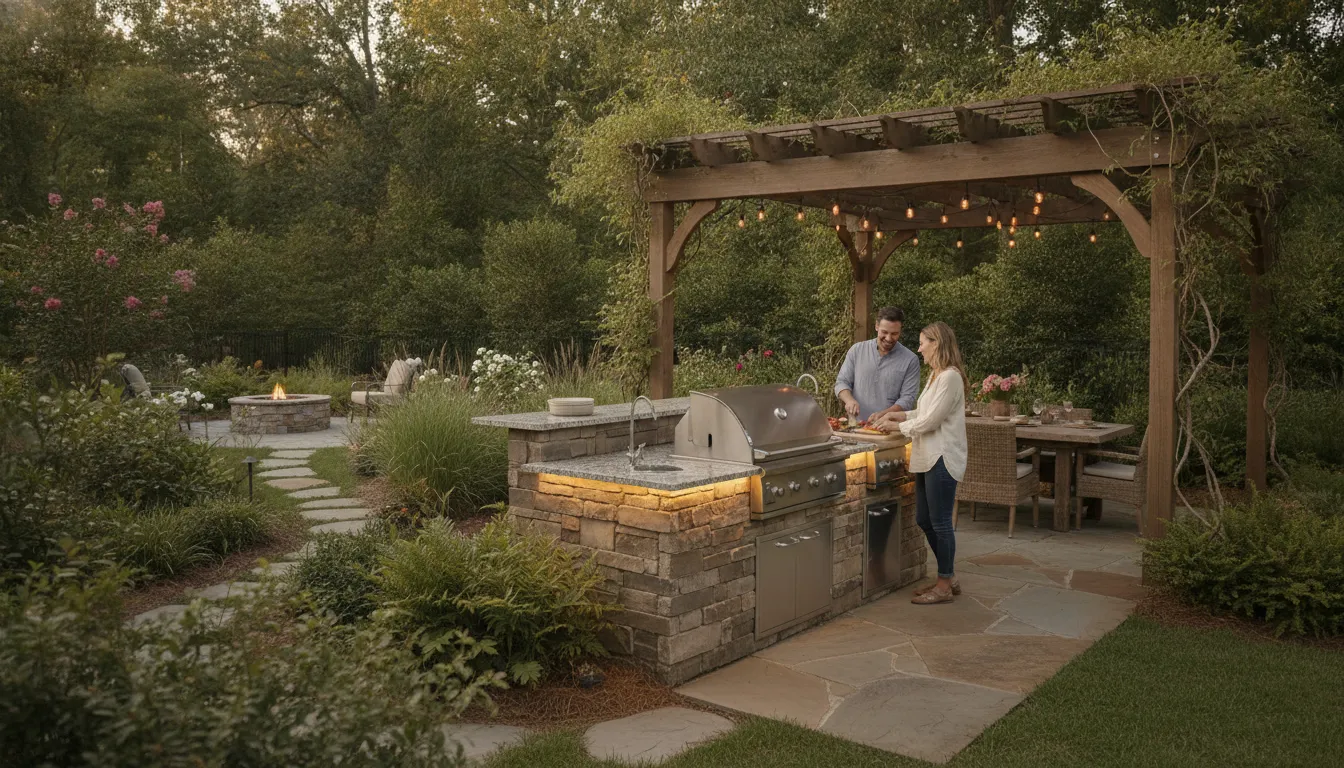
The best outdoor kitchen feels less like a collection of appliances and more like a well-planned working kitchen. A grill island anchors the space. The real convenience comes from arranging each station in the order you use it: Bring food from storage, prep it, cook it, and serve it without crossing the same path repeatedly. This logical relationship between the grill, sink, and refrigerator is often called the work triangle. See more examples in Fun Outdoor Living’s outdoor kitchen gallery.
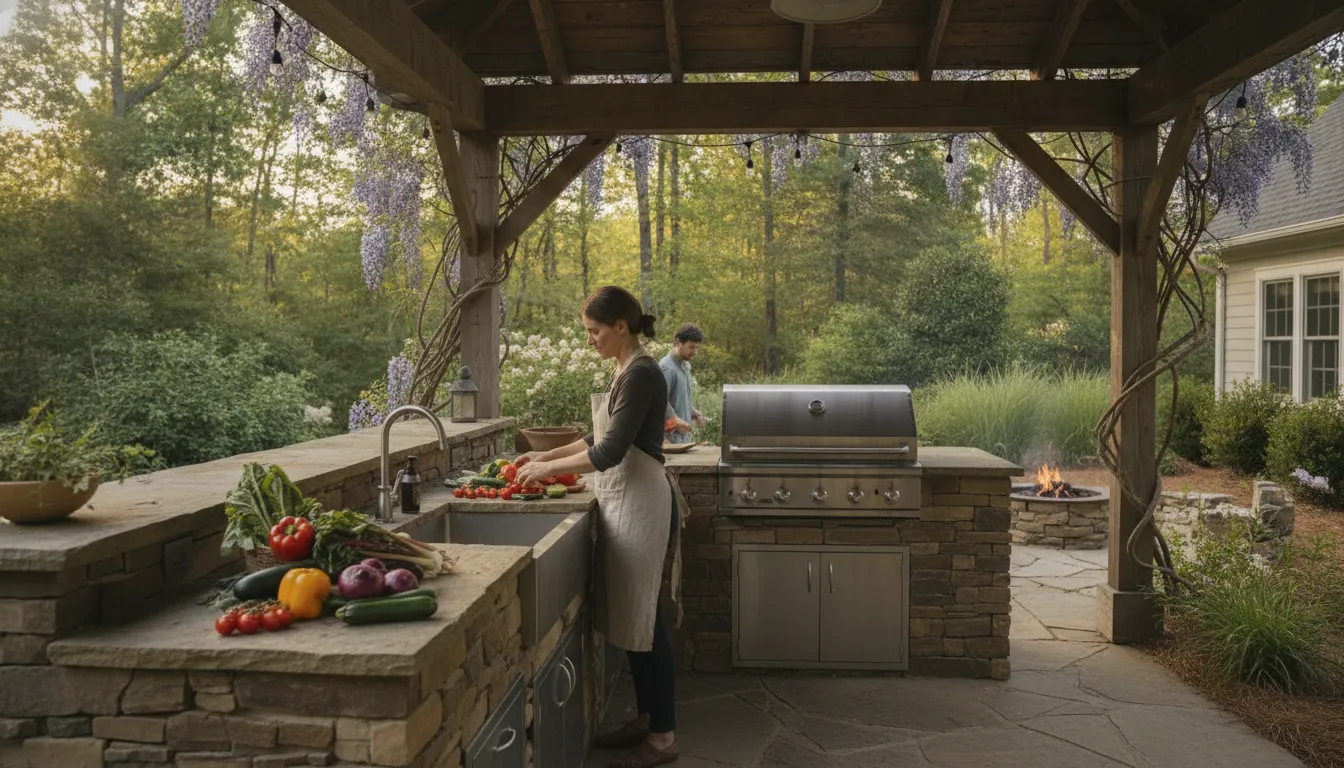
Start beside the grill with a generous, uninterrupted prep counter. At least 36 inches of contiguous surface gives you room to set down a tray. Season ingredients, transfer food from the grill, or work with a cutting board without constantly shifting things. This is practical planning guidance, not a building-code requirement, and your household’s cooking habits should determine whether you need more.
- Grill island: Place the main cooking appliance where the cook can stay connected to guests without blocking the primary walkway.
- Prep and cleanup: Add a sink near the prep counter so rinsing produce, washing tools, and cleaning up do not require repeated trips indoors.
- Cold storage: Choose a refrigerator specifically rated for outdoor use, since it is designed to handle changing temperatures and moisture.
- Organization: Use weather-conscious drawers and cabinets for utensils, serving pieces, fuel, and accessories. Include a designated pull-out trash bin to keep waste contained and help discourage pests.
- Seating: Provide counter seating or nearby dining space so guests can talk with the cook while food is being prepared.
Clearances matter just as much as convenience. Leave sufficient room around the grill and prep zones to operate the equipment safely and avoid accidental contact with surrounding counters. Keep hot cookware and active cooking paths separate from guest traffic, especially when children are present. If the island sits near a door, make sure people carrying food can move between the house and backyard without passing directly behind the cook.
A sink, outdoor-rated refrigerator, storage, and trash solution may require plumbing, electrical, and drainage planning. Resolve those connections early rather than treating them as last-minute additions. The result is a kitchen that supports the way your family actually cooks: Ingredients stay close at hand, cleanup stays contained, and more time is spent outside with the people gathered around the island.
For a layout tailored to your property, a free consultation and 3D design can connect your cooking routine with safe clearances, utilities, seating, and the rest of the backyard.
Which Grill and Appliance Mix Fits Your Backyard?
Short answer: Choose appliances around your cooking habits, available footprint, utilities, service access, and the way guests move through the backyard. A built-in Bull or Lynx grill may suit a permanent island, while a Big Green Egg or Blackstone can add a specialized cooking style when the layout provides safe placement and landing space.
The right appliance package depends less on having every available feature and more on how you actually cook. A family that grills weeknight meals may need a dependable main grill, prep space, and storage. Someone who hosts often may value a side burner, warming drawer, or extra cooking surface. Start with the footprint, utilities, and traffic pattern, then choose equipment that supports those routines.
Built-in grills create a clean, integrated look and make the grill island feel like part of the architecture. They are a strong fit when you are building a permanent kitchen with planned gas, electrical, and counter connections. Freestanding or modular systems offer more flexibility when the patio is smaller, the layout may change, or you want a simpler installation path. Modular components can still provide a coordinated appearance and high performance without the complexity of custom masonry construction, according to Fun Outdoor Living’s outdoor kitchen gallery.
| Option | Works well for | Strengths | Trade-offs to plan for |
|---|---|---|---|
| Built-in grill. | Permanent islands. | Integrated appearance. | Needs fixed utilities and clearances. |
| Modular system. | Smaller patios. | Flexible layout. | Less custom storage. |
| Bull or Lynx grill. | Established grill lines. | Consistent cooking options. | Compare size and service support. |
| DCS grill. | Permanent cooking zones. | Coordinated appliance package. | May require more space. |
| Big Green Egg or Blackstone. | Specialized cooking. | Adds menu variety. | Needs landing space and safe placement. |
Specialty appliances should solve a real cooking need. A side burner keeps sauces and vegetables outside instead of sending the cook indoors. A pizza oven can support family pizza nights, while a warming drawer helps hold food when guests arrive at different times. Each addition needs landing space and safe clearance around the grill and prep zone. In Carolina’s heat, rain, and humidity, outdoor-rated components and accessible service parts matter as much as the initial feature list.
For a closer look at Bull, Lynx, and DCS, review these outdoor kitchen grill options. The goal is not to select the most elaborate package. It is to balance footprint, cooking habits, maintenance, serviceability, and the way guests move through your backyard.
How Do You Choose Materials for Carolina Weather?
Short answer: Favor outdoor-rated stainless steel, durable masonry or stone veneer, and slip-resistant paving. Then plan drainage, shade, cleaning access, and seasonal inspections. No finish is maintenance-free, but materials selected for moisture, heat, and changing weather can make the kitchen easier to clean and inspect through Carolina seasons.
Material selection shapes how an outdoor kitchen looks on opening day, but it also determines how comfortably it handles Carolina heat, rain, humidity, and changing winter conditions. The right combination should support the way you cook and gather without turning every season into a repair project. In practical outdoor kitchen ideas, weather resistance is part of the design, not an afterthought.
Start with the surfaces that take the most exposure
For grills, doors, drawers, and other exposed accessories, high-quality stainless steel is a dependable starting point. It is designed for outdoor use and resists corrosion in demanding environments, making it a sensible choice where moisture and temperature changes are unavoidable. Good construction still matters. Seams, hardware, drainage, placement, and routine cleaning all affect how the kitchen performs over time.
The base of the island needs a different approach. Natural stone or a high-quality stone veneer can provide a durable exterior while helping the kitchen feel connected to the surrounding landscape. Stone also gives the island visual weight without making it look like a freestanding appliance dropped onto the patio. Choose a finish that works with the home, retaining walls, walkways, and other materials already in the backyard.
Think beyond the island and grill
Heat and moisture do not stop at the countertop. Select countertop and surrounding finishes with their location and exposure in mind. Moisture-resistant masonry helps protect the structure, while well-planned edges and drainage can reduce the chance of water lingering around cabinets or utility connections. No material makes an outdoor kitchen maintenance-free, so favor finishes that are straightforward to clean and inspect.
The surface underfoot deserves equal attention. Water from rain, a sink, or routine cleanup can make a smooth patio uncomfortable and unsafe, particularly around prep areas. Durable, slip-resistant pavers provide a more secure walking surface in changing weather and help define the kitchen as a deliberate outdoor room. Explore Fun Outdoor Living’s outdoor pavers when comparing patio materials, patterns, and transitions.
Finally, consider the complete material palette rather than choosing each element in isolation. A coordinated mix of stainless steel, stone or stone veneer, and slip-resistant pavers can make the cooking area feel natural beside the home. During design, review sun exposure, water flow, cleaning access, and the paths guests will use. These details help create a kitchen that remains welcoming after a hot summer afternoon, a heavy rain, or a cool Carolina evening.
Does an Outdoor Kitchen Need a Cover, Lighting, or Fire Feature?
Short answer: Not every kitchen needs a cover or fire feature. Shade, layered lighting, and carefully planned ventilation can make a Carolina outdoor room more comfortable and useful. A pergola can filter sun, while a solid roof can provide stronger weather protection. Task lighting can support cooking after sunset when the plan also preserves safe clearances.
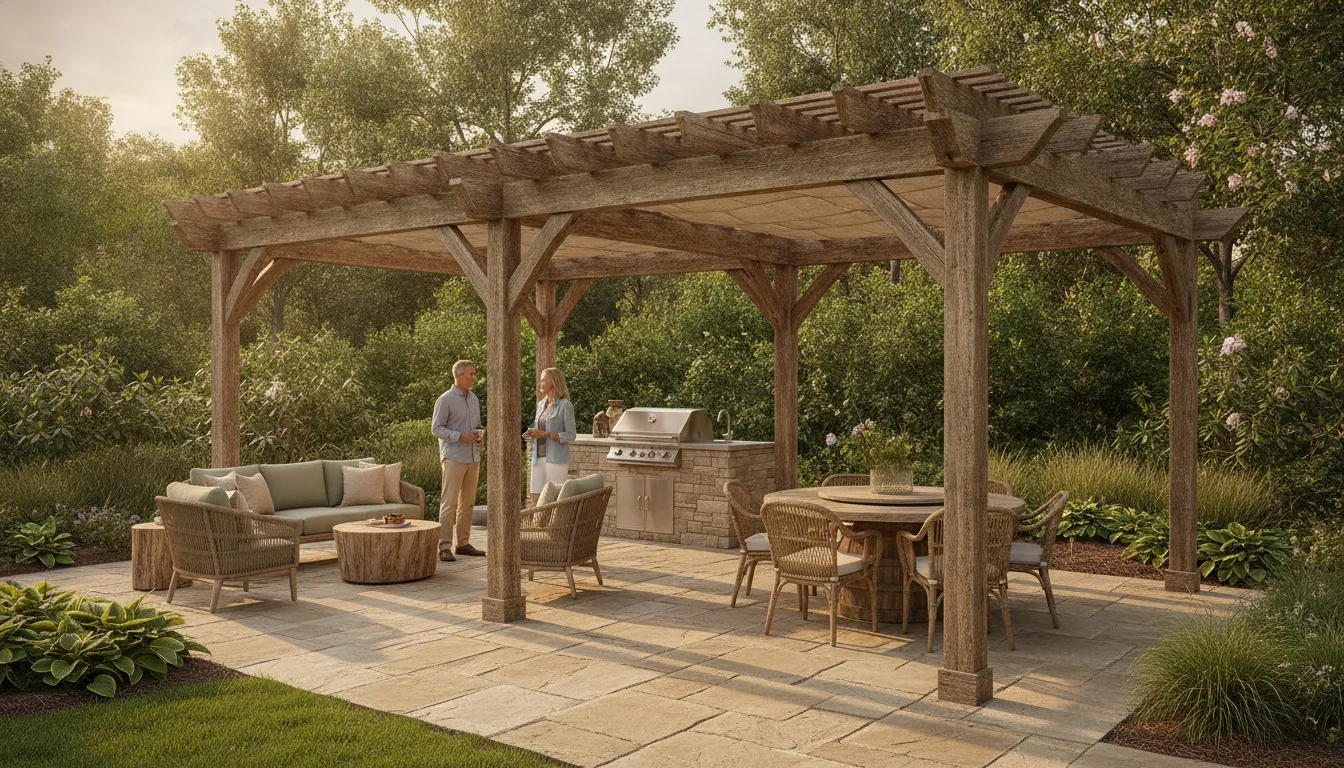
A cover is not required for every outdoor kitchen, but it can make the space more comfortable and useful through Carolina sun, rain, and changing seasons. A pergola may provide filtered shade, while a solid roof offers more dependable protection for the grill, counters, appliances, and guests. The right choice depends on your home’s architecture, the kitchen’s orientation, and how often you expect to cook outdoors.
Covered cooking areas need careful planning. A roof or ceiling can trap smoke, heat, and grease, so a grill beneath it should have an outdoor-rated ventilation hood designed to exhaust those byproducts safely. Review the details in this guide to outdoor kitchen ventilation before finalizing the structure. Also preserve sufficient clearance around the grill and prep zones so doors, lids, and people can move safely. These practical decisions are part of the design, not details to solve after construction.
How should you light an outdoor kitchen?
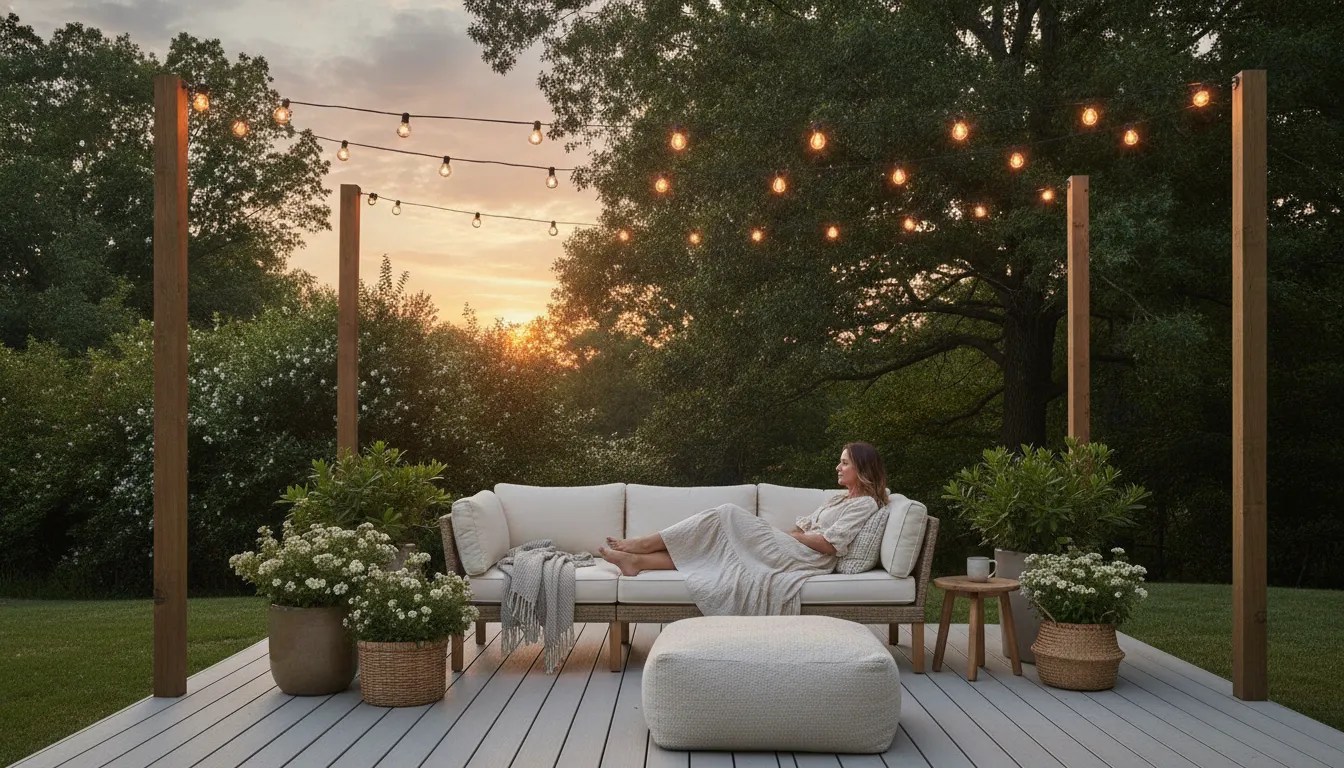
Plan lighting in layers rather than relying on one bright fixture. Task lighting over the grill and prep counter helps you see food, tools, and surfaces after sunset. Low, even lighting along steps and walkways supports safer movement between the kitchen, house, and seating area. Ambient fixtures around the dining space create a softer setting for conversation without putting glare in anyone’s eyes. This combination supports both safe cooking and the relaxed atmosphere that makes people want to stay outside. Outdoor kitchen examples can help you compare how lighting, seating, and circulation work together.
What safety details belong in the plan?
Food safety continues after the grill is installed. The CDC recommends keeping meat, poultry, and seafood refrigerated at 40 F or below until cooking. Use a clean plate for cooked food, and discard marinades that have touched raw meat juices. Use a food thermometer, including 165 F for poultry and 160 F for ground meats. Refrigerate leftovers in covered, shallow containers within two hours of cooking. See the CDC’s grill safety guidance for the complete recommendations.
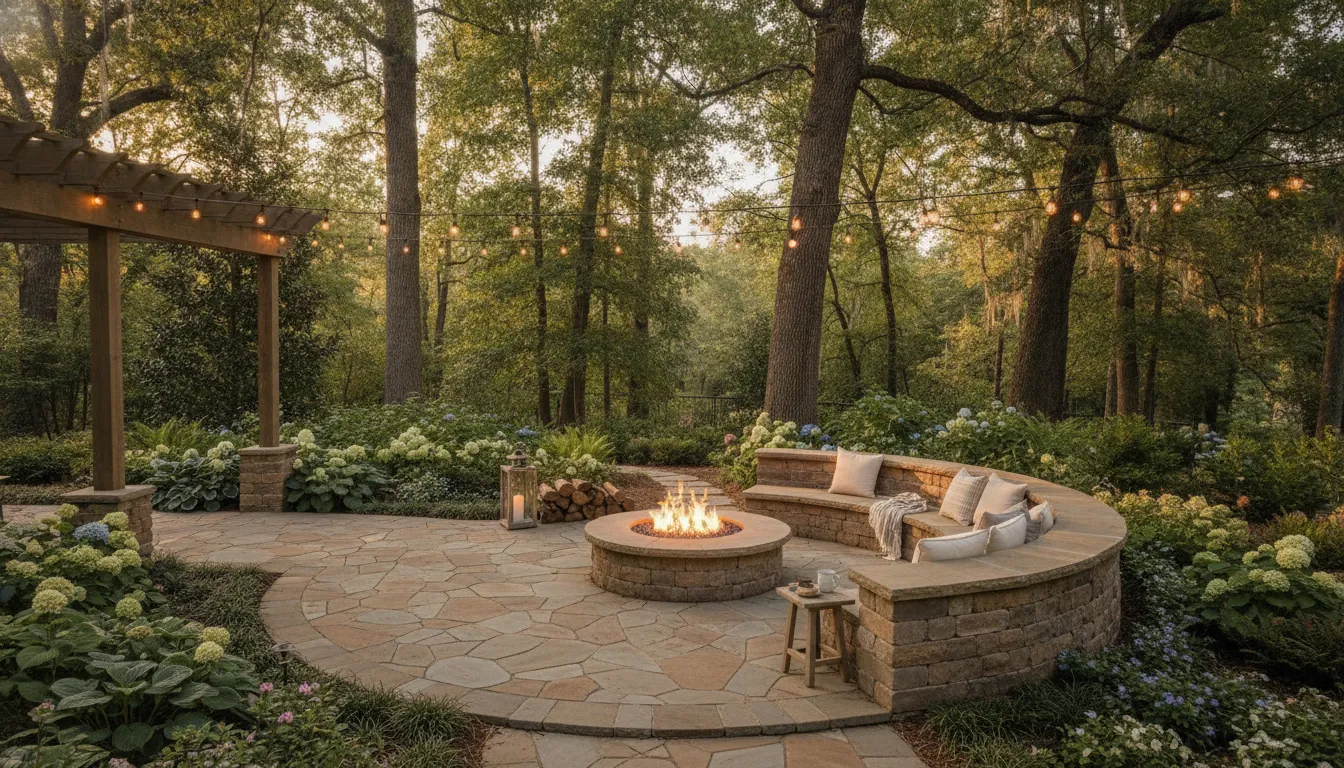
Finally, leave enough room for the cook and guests to share the area without crowding the hot zone. Counter seating can keep conversation close, while a separate dining arrangement gives people more space. A nearby gas fire pit or stone fireplace can add warmth and extend outdoor gatherings into cooler months. Explore the outdoor fire features gallery for ways to connect cooking, seating, and seasonal comfort without making fire the center of every design.
How Can Outdoor Kitchen Ideas Make a Complete Backyard Feel Like Home?
Short answer: Connect the kitchen with seating, shade, paths, landscaping, and nearby outdoor features so the backyard supports both cooking and everyday life. The strongest outdoor kitchen ideas create a comfortable relationship between the home, the cook, and the people gathered outside without sacrificing practical access to utilities or service.
The most successful outdoor kitchen ideas do more than create a place to grill. They give the backyard a natural relationship to the rooms, routines, and people already shaping daily life inside your home. A well-placed dining area can make weeknight meals easier. A comfortable seating zone gives guests somewhere to settle without crowding the cook. Paths should connect the kitchen to the house, garden, and other outdoor areas without forcing people through the work zone.
Shade is part of that experience, not an afterthought. A covered porch, pergola, or strategically placed canopy can make the space more comfortable during a hot Carolina afternoon. Thoughtful landscaping can soften the edges of the kitchen, frame views from inside the home, and create a sense of separation without making the backyard feel divided. The goal is a layout that supports different kinds of use, from a quiet morning coffee to a family dinner or a larger gathering.
Year-round design also means considering how the space works when the weather changes. Sufficient seating lets the kitchen remain a social hub, while an appropriately planned fire feature nearby can provide warmth and encourage people to stay outside during cooler months. A gas fire pit or stone fireplace should be coordinated with the rest of the layout, including safe clearances and comfortable circulation. It should not be added wherever space happens to remain. You can explore examples of this broader approach in the outdoor kitchen gallery.
Integration matters behind the finished surfaces, too. Utility planning, construction, appliance installation, and future service all affect how confidently you can use the space. Fun Outdoor Living brings design, construction, sales, and service together, helping homeowners review a buildable plan before work begins and avoid the third-party runaround. Its 3D design process helps connect your goals with the actual backyard, while professional installation supports the safe integration of utilities and cooking equipment.
Before choosing a contractor, review finished projects and listen to what homeowners say about the experience after installation. The company’s customer reviews can provide useful context alongside photos, showroom visits, and an in-person conversation about your property. Seeing completed work helps you judge details that drawings cannot fully show. Notice how seating relates to the grill, how guests move through the space, and whether the design feels connected to the home.
Learn More About a Free Outdoor Kitchen Consultation
Frequently Asked Questions
What are the essential components of an outdoor kitchen?
Start with a grill, a dedicated prep surface, outdoor-rated refrigeration, and storage for tools and serving pieces. A sink, trash pullout, seating, and specialty appliances can make the space more comfortable, depending on how you cook and host.
Do I need a roof or cover for my outdoor kitchen?
A roof, covered porch, or pergola is not required for every layout, but it can help shield the kitchen from Carolina sun and rain. If a grill sits beneath a roof, plan for an outdoor-rated ventilation hood that exhausts smoke, heat, and grease safely.
What materials work best for an outdoor kitchen in a humid climate?
Choose materials designed for moisture, heat, and changing weather. High-quality stainless steel works well for grills and accessories, while stone veneer creates a durable island base. Slip-resistant pavers are a practical choice for the surrounding floor, especially near sinks and prep areas.
Can I put an outdoor kitchen on a wood deck?
It may be possible, but the design must account for the grill type, clearances, heat exposure, utilities, and the deck structure. A professional review can identify safer placement and appropriate materials before construction begins.
How do I maintain an outdoor kitchen in Carolina weather?
Clean stainless-steel surfaces regularly, keep food and cooking tools organized in closed storage, and follow each appliance manufacturer’s care instructions. Inspect seals, utilities, refrigeration, and exposed finishes seasonally, particularly after periods of heavy rain or extended heat.
See What Your Carolina Backyard Could Become
A thoughtful outdoor kitchen can make weeknight meals, weekend hosting, and time with family feel more connected. The right layout brings cooking, prep, storage, and seating together around the way you use your backyard. Learn more about a free outdoor kitchen consultation and 3D design for your Carolina backyard. Take the next step toward a space that fits your home and routines.