Experience the Best in Outdoor Living: Family Owned | Local Manufacturing | Single Point of Contact
Built in Grill Island Charlotte: Costs and Planning Built in Grill Island Charlotte: Costs and Planning

Built in Grill Island Charlotte Planning Guide

An outdoor kitchen should make Tuesday dinner as easy as a Saturday cookout. In Charlotte, the wrong island can leave you short on prep space, utilities, or gathering room.

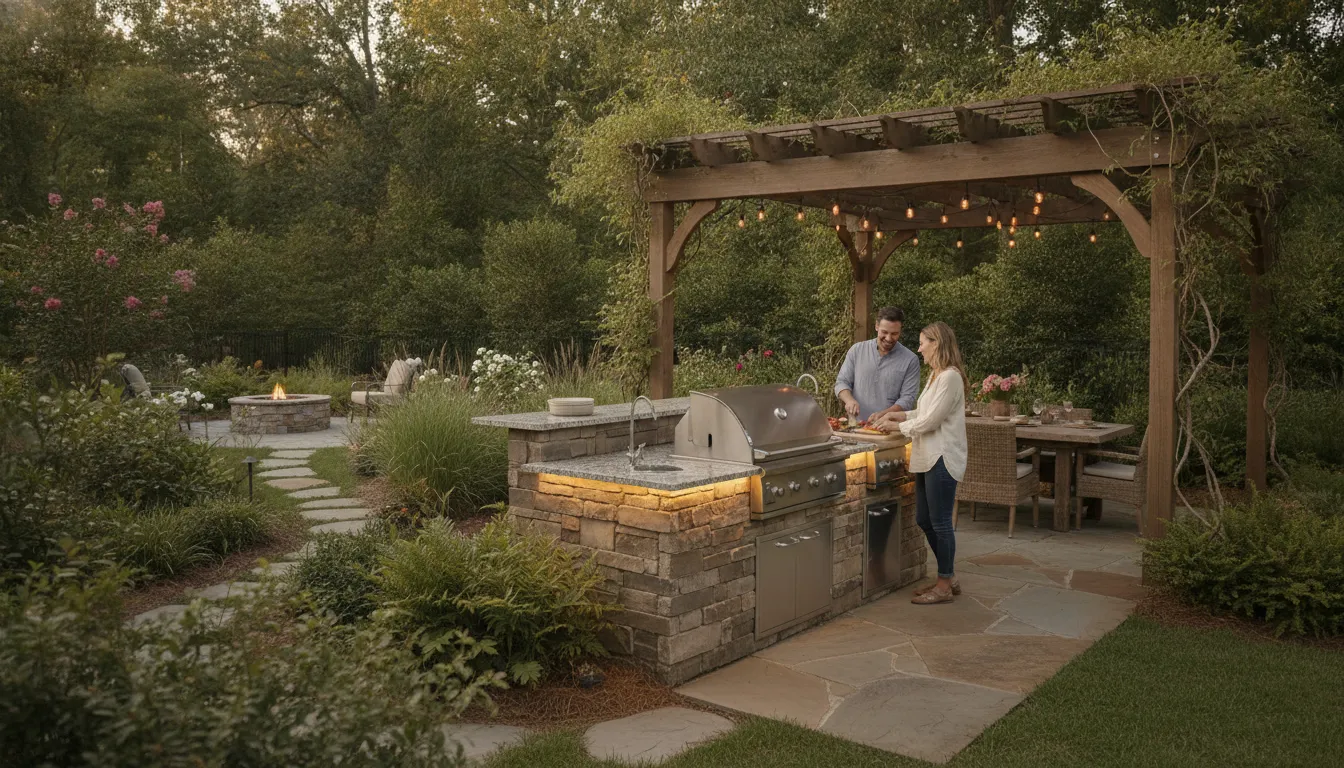
A built in grill island Charlotte homeowners choose well begins with cooking habits, then matches the island structure to the site and budget. Prefab islands simplify layout choices, while masonry and custom builds allow more control over finishes, storage, appliance placement, and how the island fits the patio. Choose the grill first, since its opening, heat clearances, fuel connection, and nearby electrical needs shape a safe and useful plan. Use outdoor-rated counters, plan for drainage and service access, and decide early whether refrigeration, lighting, or extra burners serve the way you host. Because smoke needs a clear path away from people and covered areas, the CDC identifies appropriate outdoor air and ventilation as a practical air-quality step.

So which route gives your family the right amount of cooking space without paying for features you will rarely use? Built in grill island Charlotte: start with the way you cook brings the decision back to meals, guests, and weekly habits. The path begins with:

Built in grill island Charlotte: start with the way you cook

A built in grill island in Charlotte should begin with a simple question: what will you cook outside most weeks? A family making quick burgers needs a different layout from a host serving steaks, sides, and drinks. Start with meals and movement, not a long list of appliances.

Your cooking routine

Think about your usual menu, then note what must stay within reach. Grill-first cooks may need prep counter space and storage for tools. A cook who serves side dishes may want burner space, chilled ingredients, or a landing spot for hot pans.

This planning step also keeps the island useful after the first party. Review grill island planning ideas as you sort needed features from extras. The goal is not the largest island; it should support the way food gets made and served.

Gathering and weather

Outdoor cooking is also about where people stand, sit, and pass through the space. Decide if guests tend to gather near the cook or at a separate dining table. Keep traffic away from hot cooking surfaces, and allow room for platters and serving.

Then plan for sun, rain, wind, and smoke before setting the final position. A covered or semi-enclosed cooking area needs careful airflow planning. The CDC ventilation guidance notes that suitable outdoor air and ventilation rates help support good indoor air quality. That point makes airflow worth discussing when a grill sits near a roof, wall, or gathering area.

A plan built around use

A general sales page often starts with products. A useful plan starts with how often you cook and how many people you host. It also starts with which tasks feel awkward in your current yard. Utilities, counters, storage, and seating should work together.

For homeowners comparing a prefab island with a tailored build, daily-use notes are a clear starting point. They can guide an early talk about fit, features, and site needs. To map those choices to your backyard, schedule a free home consultation before selecting a grill island layout.

Prefab, masonry, or custom outdoor kitchen?

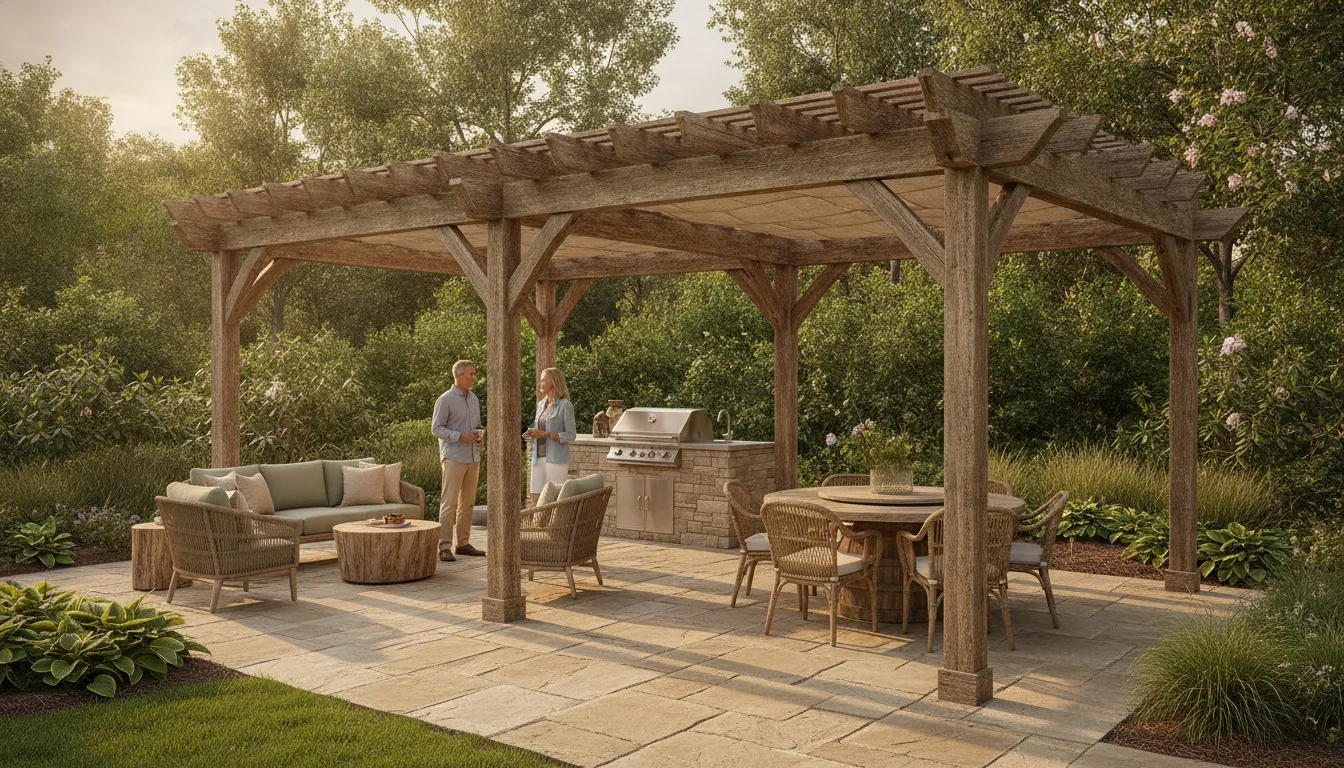
Choosing a built in grill island in Charlotte starts with how the space will work. A compact cooking zone may call for a simple island. A patio built for hosting may need more counter space, storage, and planned utility routes. Prefab, masonry, and custom kitchens can each fit the right yard and goals.

Choosing the project fit

Start with the grill, serving space, and features your household will use. Reviewing built-in grill options early helps keep the island size and cooking setup aligned. Then compare the build type with your patio shape, finish choices, and room for future changes.

Option. Best fit. Main trade-off.
Prefab grill island. Simpler cooking zones. Less layout control.
Masonry island. Permanent built-in look. Harder to change later.
Custom outdoor kitchen. Whole entertaining zones. More planning decisions.

.

No option is best for every home. Prefab can keep a focused cooking setup simple. Masonry can suit a permanent island planned for one area. A custom kitchen may suit a project where appliances, seating, and outdoor features must work together.

Utility planning before finishes

Utility planning matters with every build type. Decide early whether the grill needs gas, power, water, lighting, refrigeration, or storage. Grill placement should also account for smoke flow and open air around the cooking area. The CDC ventilation guidance notes that outdoor air and ventilation help support good air quality.

This step is useful even for a smaller island. A prefab unit still needs a sound location and safe connections. With masonry or custom plans, routes can be harder to change after counters and finishes are installed.

Comparing proposals clearly

For a useful comparison, ask each designer or builder to show what is included. A proposal should make the cooking layout, materials, appliances, site needs, and utility work easy to review. Clear scope lets you compare the project, not just the visible grill and counter.

  • Confirm the grill size, counter area, storage, and appliance openings.
  • Ask where utility connections run and who handles that work.
  • Review finish choices, site preparation, service access, and future replacement needs.

This approach keeps the choice practical. The right island fits the patio and supports how you cook. It also comes with a build plan you can understand before work begins.

How do you choose the right built-in grill?

A built in grill island Charlotte homeowners plan should start with the grill, not the cabinet shell. Each built-in model sets the cutout size, support needs, fuel connection, and clearance around the cooking area. Choose it early, and the island can be drawn around an appliance that fits the way you cook.

Cooking size and fuel type

Begin with how often you grill and how many guests you tend to feed. A wider cooking surface helps with large gatherings. A more compact grill can leave useful counter space for prep and serving. Review built-in grill options by size and setup before locking in an island layout.

Fuel choice affects planning as well as cooking style. Natural gas suits a fixed outdoor kitchen when a gas line is part of the project plan. Propane may fit a different setup. Charcoal or kamado cooking changes how heat and smoke must be handled.

For a household that cooks on weeknights and hosts on weekends, flexibility may matter more than maximum width. A side burner or added prep area can be useful, but it takes space from the main island run. Set priorities before materials and finishes begin to drive the plan.

Clearance, hood, and safe airflow

Next, place the grill within the full outdoor kitchen plan. A covered or semi-enclosed cooking area needs careful airflow planning because grilling can produce smoke and airborne contaminants. The CDC guidance on ventilation explains why fresh air and proper ventilation matter for air quality.

Check the grill maker’s required clearances before choosing a hood, backsplash, or nearby seating. The hood must suit the grill location and cooking pattern, not just the look of the island. This step helps prevent a good-looking design from creating a smoky, cramped work area.

Burners, service, and cabinet fit

Look past the showroom shine and ask how the grill is built. Compare burner materials, even heat control, ignition access, and replacement part supply. Then read warranty terms for the burners, cooking box, and other covered parts.

Service access also belongs in the first drawing, not after construction begins. An island may need access panels and room for fuel connections, storage, cooling, or utility work. Use grill island planning to consider parts that will share cabinet space with your grill.

Final cabinet dimensions should come after the exact grill is selected. A chosen model gives the designer a real cutout, clearance plan, and access plan to use. That order keeps a Charlotte grill island focused on fit, cooking comfort, and long-term care.

Countertops, cabinets, and Charlotte weather

For a built in grill island Charlotte homeowners can use for years, materials matter as much as the grill layout. The surface and base must suit cooking heat, spilled food, damp weather, sun exposure, and cold snaps. Start by asking what will be cleaned often, what gets full sun, and what must stay dry.

Countertops built for outdoor cooking

An outdoor counter sits beside heat and food, so look beyond color. Ask how each slab handles hot cookware, grease, red wine, pollen, and routine cleaners. An outdoor-rated surface with simple seams may be easier to clean than a porous finish that needs more care.

Request samples when possible. Notice texture around prep areas, since deep texture can hold crumbs and grease. At the grill opening, confirm that the counter cutout and edge suit the appliance instructions.

Freeze-thaw risk starts with water in a material. Ask how the selected surface, grout, sealant, and overhang manage water before a cold snap. Also check whether sun may fade a finish or make a dark counter hot during summer cooking.

Frames and cabinets behind the finish

The finish hides the part that supports the load. For a permanent island, frame choices may include metal studs, masonry block, or precast concrete parts. These options appear in local outdoor kitchen construction details.

Each frame type needs clear openings for appliances, vents, doors, and service access. Masonry can give a solid base. A metal-stud or precast system may fit a different design, finish load, or site plan.

Cabinet doors and drawers need their own review. Ask for outdoor-rated boxes, hinges, and handles, then check that rain cannot sit on shelves. Good access matters when an appliance or utility connection needs service later.

Moisture is more than a cleaning issue. A National Academies review on moisture control and ventilation notes both as parts of healthy building practice. In an island, avoid trapped water and allow wet surfaces to dry.

Maintenance before materials are selected

A durable island is still not maintenance-free. Before choosing a material, ask for a simple care plan with approved cleaners, sealing needs, winter checks, and repair options. The plan should match how often your family cooks and whether the island is under a roof.

Clarify what staining, fading, or surface wear is expected over time. Ask how grease near the grill should be removed and how stone or grout is inspected after winter. A small upkeep routine can help keep problems from hiding behind doors or under edges.

This planning step helps you compare storage needs and service access before construction begins. Review grill island planning as you list components and cabinet uses. For a larger project, view finish samples in daylight and ask who handles future repairs.

What utilities and ventilation should you plan before building?

Map utilities before the island footprint

A built in grill island Charlotte homeowners plan well starts below the countertop. Choose appliances and their locations before setting the base, patio cuts, or finish materials. Gas, electrical service, water supply, and drainage affect island placement and crew access.

First, decide whether the grill will use natural gas, propane, charcoal, or another fuel. A gas grill may need a planned fuel route and an accessible shutoff location. A refrigerator, lighting, ignition, outlets, or side burner may shape the electrical plan. A sink adds supply and drain questions, plus freeze and service access concerns.

Early choices help avoid late changes, such as moving an appliance after utility paths are planned. When comparing grill island planning options, list every powered, plumbed, or fuel-fed feature. Bring that list to the site visit. The team can check it against the patio and home connection points.

Ventilation, heat, and smoke paths

A grill should not be treated like a countertop insert alone. Cooking creates heat, smoke, grease, and combustion byproducts. The CDC ventilation guidance explains that suitable outdoor air and ventilation rates support good air quality. That principle matters around covered patios and semi-enclosed cooking areas.

Plan where smoke will move on a typical cooking day. Look at roof cover, walls, screens, nearby doors, and seating areas. An open-air island can handle smoke differently from a grill under a pavilion or near a porch ceiling. For a covered setting, ask whether a vent hood or another smoke plan belongs in the design.

Clearances begin with the selected grill and its installation instructions. Heat-producing equipment needs room from combustible surfaces and places where people walk or gather. Keep prep flow in mind as well. The cook should not cross a tight traffic path with hot food or tools.

Ready to review a site, fuel choice, and appliance layout? Schedule a free home consultation to discuss how the cooking space can fit your backyard plan.

Permits and safety checks before construction

Utility planning is also safety planning. Before construction begins, confirm which work needs a permit or inspection in your Charlotte-area jurisdiction. Gas, electrical, structural, and plumbing work may involve separate reviews. The need depends on project scope and local rules.

  • Record the grill model, fuel type, and manufacturer clearance guidance.
  • Locate shutoffs, outlets, service panels, water lines, and drain routes before finishes are installed.
  • Check smoke direction near doors, windows, roofed spaces, and guest seating.
  • Confirm utility work, permit needs, and inspection steps with the project team before building.

A clear plan aligns the island shape, appliances, utility access, and safety needs before materials are committed. It gives installers a practical route for each connection and future service point. That is easier than reopening a finished island because a line, vent plan, or clearance was missed.

What affects the budget for a grill island in Charlotte?

Size, structure, and appliance choices

Budget starts with the size of the island and the way it is built. A short prefab run may need fewer design choices. A masonry or custom island can add more finish work, utility routes, and site coordination.

The grill itself also changes the plan. Larger built-in grills need wider openings, more counter support, and more clearance around heat. Added features such as a side burner, refrigerator, sink, storage drawers, lights, or a trash pullout can each improve use, but each one also adds cost and planning.

Materials and site preparation

Countertops, cabinet structure, veneer, and patio conditions all affect the final proposal. A simple finish on a level patio is different from a project that needs grading, a new base, matching stone, or a larger outdoor living layout. Local outdoor kitchen builders also note that pricing often changes with size, materials, and features.

For Charlotte homeowners, weather should be part of the cost discussion. Outdoor-rated counters, doors, hinges, and service panels may cost more up front than lighter-duty choices. They can also make daily use and long-term care easier. Ask how each material handles sun, rain, grease, cleaning, and winter checks.

Utility work and clear scope

Gas, electrical, water, drainage, and permits can be easy to overlook when the focus stays on the grill. They should be priced before work starts. A clear proposal should show appliance choices, finish materials, utility responsibilities, site preparation, and service access.

This is also where financing may help some families plan with more confidence. Review financing options if you want to compare timing, payment structure, and project scope before choosing between prefab, masonry, and custom paths.

The goal is not to chase the lowest visible number. It is to understand what is included, what may change, and which choices will matter most after the island is built.

Planning steps before you build

A good grill island plan turns a broad idea into a sequence of practical decisions. The steps below help you compare options before a cabinet, counter, or utility route is locked in.

  1. Measure the space and traffic paths. Note patio width, doors, seating areas, steps, roof lines, and the path from the indoor kitchen. Leave room for people to move around hot food and open appliance doors.
  2. Choose the way you want to cook. Decide whether the island is mainly for weeknight grilling, weekend hosting, low-and-slow cooking, or a full outdoor meal prep station. This choice guides the grill size and the need for burners, refrigeration, or storage.
  3. Select the grill before the island is finalized. Each model has its own cutout, clearance, fuel, and access needs. Confirm the grill first, then design the island around it.
  4. List every utility need. Include gas, electrical outlets, lighting, ignition, refrigeration, water, drainage, and future service access. Early utility planning helps prevent finished counters or walls from being reopened later.
  5. Compare materials for outdoor use. Ask how counters, cabinet frames, doors, and finishes handle heat, rain, sun, grease, and cleaning. The best choice should fit both the look of the home and the care routine you will follow.
  6. Review a clear proposal. The proposal should show scope, materials, appliance choices, utility responsibilities, site work, and timing. Clear scope makes it easier to compare a prefab island with a masonry or custom build.
  7. Walk the site with a designer. A site visit can reveal grade, drainage, smoke direction, connection points, and layout limits. Use the visit to ask what will make the island easier to use and maintain over time.

These steps slow the process down in a useful way. They keep the project focused on how the space will feel on an ordinary evening, not just how it looks in a drawing.

Frequently Asked Questions

How much does a built in grill island cost in Charlotte?

The cost of a built in grill island in Charlotte depends on island size, grill model, countertop choice, utility work, site preparation, and added storage. A prefab layout can reduce design decisions, while masonry and custom kitchens may require more labor and coordination. A Charlotte-area builder also notes that pricing changes with size, materials, and features. Request a line-item proposal before choosing a format.

Is a prefab grill island better than a custom outdoor kitchen?

A prefab grill island can be a good fit when the cooking setup, footprint, and finish options meet your needs. A masonry island or custom outdoor kitchen is often better for unusual patio dimensions, matching existing hardscape, or adding several appliances. For Charlotte homeowners, the right choice depends on daily cooking habits, utility access, available space, desired materials, and long-term maintenance expectations.

What materials are best for outdoor kitchen countertops in North Carolina?

Outdoor countertops in North Carolina should handle sun, rain, temperature changes, spills, and routine cleaning. Natural stone and poured concrete are common options, but each material has sealing, stain, heat, and maintenance considerations. Ask how the slab, finish, seams, and supports will perform outdoors. The countertop should also fit the island framing, grill cutout requirements, and the way your family cooks and entertains.

Do built in grills need ventilation?

Yes. A built in grill needs a design that manages heat, smoke, and gas safely, especially beneath a roof or near walls. Vent openings in an island may also be needed for the selected fuel type and appliance instructions. The CDC explains that appropriate outdoor air and ventilation support good air quality. Follow the grill manufacturer’s clearance requirements and applicable local requirements.

Do I need gas and electrical planning for an outdoor grill island?

Yes. Plan utilities before finalizing the island footprint, countertop openings, and appliance list. A gas grill needs the correct fuel supply, shutoff access, and appliance-compatible connection. Lighting, refrigeration, outlets, and ignition systems may require electrical service and outdoor-rated protection. Early planning helps avoid cutting finished surfaces later and keeps the layout practical for cooking, cleaning, maintenance, and future service access.

Ready to plan your Charlotte outdoor kitchen project?

Delaying your grill island plan can leave layout, appliance, utility, seating, and budget choices unsettled when you are ready to use your yard. Starting now gives you time to compare prefab, masonry, and custom approaches before appliance purchases or service requirements narrow your design options. An early conversation can clarify priorities for cooking, entertaining, electrical and gas planning, costs, and the next practical decisions for your property with confidence.

Ready to move from comparison questions to a workable plan for a built-in grill island at your Charlotte home? Schedule a free home consultation to discuss your preferred grill, project approach, site needs, utility questions, budget goals, and timing with Fun Outdoor Living.