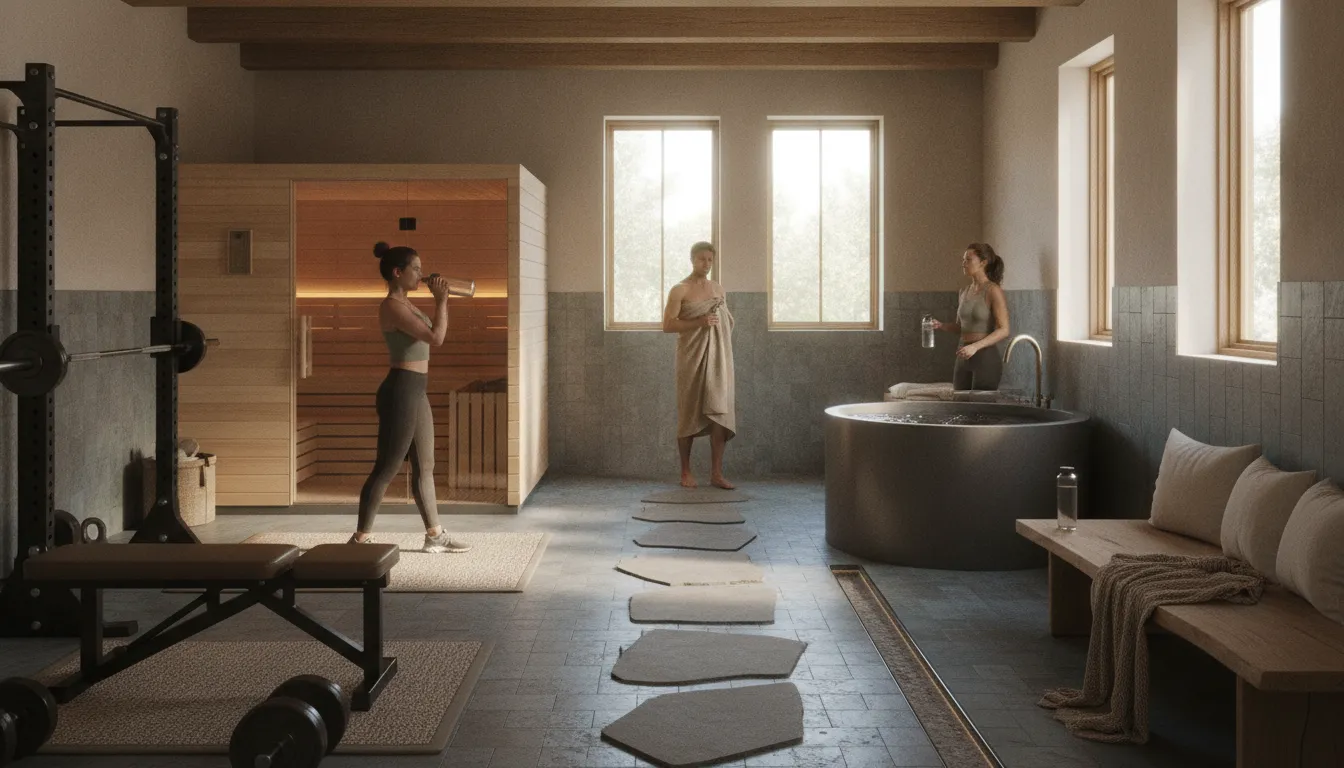
A workout room can become much more useful when exercise, heat, cold, and quiet recovery are planned as one connected experience. The goal is not simply to fit a few pieces of equipment indoors. It is to create a comfortable path from movement to recovery while accounting for moisture, utilities, drainage, ventilation, and future service access.
A home gym with sauna and cold plunge works best when the workout area comes first, followed by a clear transition zone, thermal equipment, and a dry place to pause. That sequence supports a practical routine, but the layout must also be reviewed for site-specific electrical, plumbing, structural, ventilation, and building requirements.
Thoughtful planning also makes the room easier to use every day. Before selecting equipment or finishes, consider how people will move through the space, where water and humidity will go, and how each system will be reached for maintenance. Those decisions shape the layout from the beginning.
Learn more through a free home consultation
What Makes a Home Gym With Sauna and Cold Plunge Work?
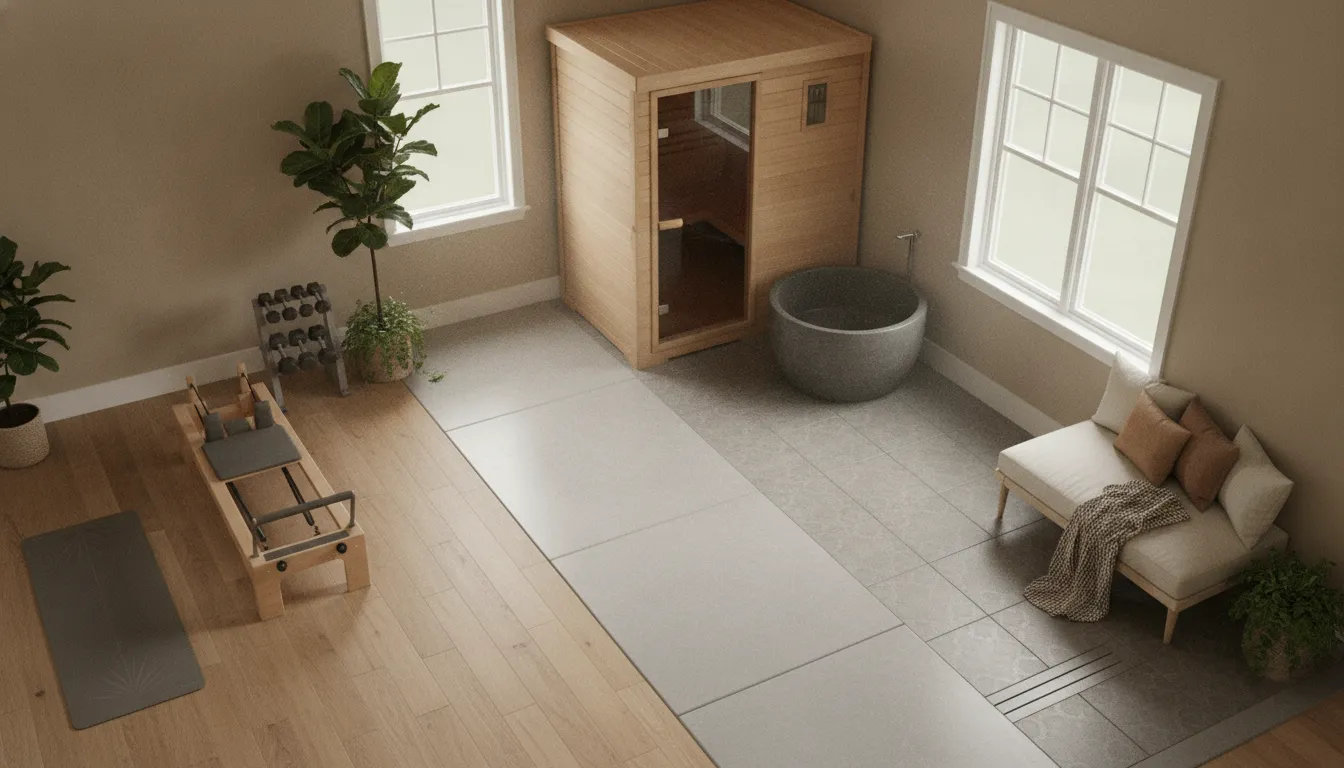
A well-planned home gym with sauna and cold plunge is more than a collection of fitness and wellness products. It is an indoor sequence that makes it easy to move from training into recovery without crossing through unrelated rooms or carrying water across finished floors. The room should support a routine that feels natural on an ordinary day, not only a dramatic wellness experience used occasionally.
Start with the workout area. Strength equipment, cardio equipment, stretching space, or a combination of the three should have a clear identity and enough room for safe movement. The goal is not to prescribe one type of training. It is to establish where activity begins, where equipment belongs, and how the space can be used without forcing every session directly into a thermal routine.
Create a clear transition from exercise to recovery
After the workout area, plan a transition zone before the sauna and cold plunge. This buffer can support a change of clothing, a towel, hydration, and a brief pause before using recovery equipment. It also helps separate active movement from wet or heat-producing areas. That distinction matters indoors, where moisture, temperature, drainage, and floor protection must be considered together rather than treated as afterthoughts.
From the transition, the sauna and cold plunge should be placed where their use is convenient but does not disrupt circulation. The exact arrangement depends on the room, product requirements, utilities, and applicable construction rules. A qualified review is important before finalizing electrical, plumbing, ventilation, structural, or drainage decisions. Product dimensions and installation requirements should also be confirmed against current manufacturer information.
Leave room for dry recovery
The final part of the workflow is a dry recovery area. A bench, chair, mat, or other comfortable place to cool down and regroup can make the space more useful between activities. Keep storage close enough for towels and care supplies, while preserving access for cleaning and service. This is where the design becomes practical: each stage has a purpose, and the route between stages is easy to understand.
This indoor approach differs from a backyard HydroTherapy Zone, which is typically planned as an outdoor wellness environment. Here, the workout area leads the design, and the sauna and cold plunge support a contained exercise-to-recovery workflow. Homeowners considering the routine itself can also review this sauna and cold plunge routine for broader context, while keeping personal pacing and medical guidance in mind.
How Should You Zone the Workout, Sauna, and Cold Plunge Areas?
The most comfortable layout follows the way you will use the room. Place the workout area first, create a clear transition, then arrange the sauna and cold plunge before ending with a dry recovery area. This sequence keeps exercise equipment, wet surfaces, heat, and quiet time from competing for the same floor space.
Linear layouts make the routine easy to follow
A linear plan places each part of the experience in order, such as weights and cardio equipment near the entry. A transition zone in the middle, and the sauna and plunge farther inside. A dry recovery seat or open area can sit beyond the thermal equipment. This arrangement is helpful when the room has a clear length and one natural circulation path. It also makes the intended routine visible to everyone using the space.
Keep the path open rather than routing it through exercise equipment. The transition zone should give you room to slow down, move safely, and manage towels or other essentials before entering a wet or heated area. Storage near this point can hold towels, robes, water, and cleaning supplies without placing loose items beside moving equipment.
Adjacent layouts reduce travel between activities
With an adjacent plan, the workout area sits beside the sauna and cold plunge instead of in a strict line. This can work well when the room is wider than it is long or when several people may use different parts of the space at once. Group the thermal equipment together, but preserve a distinct dry route around it. The goal is convenient access without turning the center of the gym into a wet thoroughfare.
Privacy also matters. A sauna or plunge placed directly in the sightline of the workout area may feel exposed, especially in a shared household. Partial separation, a small vestibule, or thoughtful door placement can make the recovery portion feel calmer without isolating it from the rest of the room.
Separated layouts can solve moisture and privacy concerns
When ventilation, drainage, or room proportions make a combined space impractical, place the workout area in one room and the sauna and plunge in an adjoining room. This gives you more control over wet and dry transitions and can create a quieter recovery setting. It also requires deliberate circulation, including a practical place to change, dry off, and store supplies between rooms.
Site-specific requirements: These are general zoning principles, not a substitute for a site review. Electrical capacity, plumbing, drainage, ventilation, structural conditions, building-code requirements, and manufacturer clearances must be confirmed for the specific home and equipment. A qualified professional should review those conditions before construction or installation.
For ideas on sequencing the experience without turning the room into a complicated project, explore this sauna and cold plunge routine resource, then adapt the flow to your household and floor plan.
How Much Space Does the Recovery Area Need?
The recovery area should feel easy to use, not like equipment has been fitted into whatever space remains. The right layout leaves a clear path between the workout zone, sauna, cold plunge, and dry recovery spot. It also gives you enough room to move safely when the floor is damp, store towels and supplies, and reach equipment for cleaning or service.
There is no universal footprint for an indoor recovery area. The best arrangement depends on the room, the selected equipment, structural conditions, and the way your household will use it. Treat the options below as planning frameworks rather than fixed floor plans. Final dimensions, clearances, drainage, ventilation, electrical, plumbing, and building-code requirements should be confirmed during a site-specific review.
| Layout | Best use | Planning priority | Trade-off | Service consideration |
|---|---|---|---|---|
| Compact | A homeowner who wants a focused transition from exercise into recovery. | Keep the route direct and preserve usable circulation around each piece of equipment. | Less room for seating, storage, or simultaneous use by more than one person. | Do not place equipment where panels, connections, or surrounding surfaces become difficult to reach. |
| Balanced | A daily wellness routine with a defined workout area, thermal zone, and dry recovery space. | Separate wet and dry activities while keeping towels, water, and care supplies close at hand. | Requires more deliberate zoning and may reduce space available for other gym equipment. | Plan access for inspection, maintenance, drainage, and ventilation rather than treating the equipment as built-in furniture. |
| Generous | A household that wants comfortable movement, shared use, and a dedicated place to pause between activities. | Prioritize open circulation, durable finishes, storage, and a calm dry recovery area. | Uses more of the available room and may require greater coordination of utilities and moisture control. | More room does not remove the need to confirm site-specific infrastructure, installation, and service requirements. |
When comparing layouts, walk through the routine rather than judging the plan from above. Consider whether you can:
- Move from exercise to the recovery zone without crossing clutter or creating a slippery bottleneck.
- Set down towels, water, and personal items without blocking doors or access panels.
- Clean around the equipment and reach the connections that may need inspection or service.
- Use the space comfortably when another household member is entering or leaving.
A balanced plan is often a useful starting point because it supports the full exercise-to-recovery flow without assuming that bigger is always better. The goal is a room that remains comfortable and maintainable after installation, not simply one that accommodates the equipment on paper.
What Do Ventilation and Drainage Require?
Moisture management deserves attention before equipment arrives. A sauna adds heat and humidity to the room, while a cold plunge introduces water that can collect during entry, exit, cleaning, or maintenance. The goal is not simply to place both products near a floor drain. It is to plan how air, water, finishes, and people will move through the space over time.
Plan for air movement, not just a fan
Sauna ventilation should be coordinated with the room, the sauna design, and the home’s existing mechanical system. Fresh-air supply, exhaust, and the path back to the surrounding space all affect comfort and moisture control. Manufacturer instructions may specify installation requirements, and those details can vary by model. A qualified professional should confirm the appropriate approach rather than relying on a generic bathroom-fan solution.
Keep moisture-sensitive materials and stored equipment out of the most exposed areas. A practical plan may include:
- Ventilation that supports the sauna and the surrounding room without exhausting air into an unsuitable cavity.
- Water-resistant surfaces near the plunge, transitions, and other areas where wet feet are expected.
- Storage for towels and recovery items that stays clear of splash and condensation.
- Enough access around equipment to inspect connections and complete routine service.
Give water a controlled path
Cold plunge drainage should account for normal use as well as draining, cleaning, and unexpected overflow. The final solution may involve floor drains, a properly designed drain connection, containment, or another site-specific approach. Waterproofing, slope, thresholds, and floor transitions should be considered together. A raised or uneven transition can become a daily trip concern, while an unprotected joint can allow moisture to reach finishes or framing.
These decisions are part of coordinated site preparation, not details to solve after delivery. Fun Outdoor Living describes its construction process as including site preparation, electrical coordination, plumbing connections, and final inspection. A free home consultation can help identify the questions that need answers before the layout is finalized.
Separate general guidance from code review
There is no universal ventilation rate, drain layout, waterproofing assembly, or clearance that fits every home gym with sauna and cold plunge. Existing slabs, finished floors, framing, plumbing routes, product requirements, and local rules all matter. Treat this section as planning guidance, then have qualified contractors and local authorities review the project where appropriate. That step helps confirm the design is suitable for the specific home and complies with applicable requirements.
How Do You Plan Electrical, Plumbing, and Service Access?
Utilities are easiest to manage when they are part of the design conversation from the beginning, not a last-minute installation detail. A home gym with sauna and cold plunge may involve electrical coordination, water connections, drainage, delivery, inspection, and ongoing service. The exact requirements depend on the equipment and the home, so treat the sequence below as a planning framework, not a substitute for a qualified site review.
- Evaluate the room and existing infrastructure. Start with the proposed location, access route, floor and wall conditions, nearby water lines, drainage options, and the home’s existing electrical setup. A qualified professional should determine what the site can support and whether additional work is needed. Do not assume that a nearby outlet, drain, or water line is suitable for the final installation.
- Coordinate the electrical plan with the equipment. Confirm the current manufacturer documentation for each sauna and cold plunge, then have qualified professionals review the electrical requirements and connection location. Loads, disconnects, protection, and code-related details are site-specific. The goal is a coordinated plan that accounts for the equipment without inventing a load or relying on a generic online specification. Fun Outdoor Living identifies electrical coordination as part of its integrated construction service, but each project still needs an appropriate local review.
- Plan water, drainage, and shutoffs. Identify how the cold plunge will be filled, drained, and maintained, and where water can be managed without damaging finished surfaces. Include practical access to shutoffs and service connections. Drainage and waterproofing details should be reviewed for the actual room, equipment, and local requirements by qualified contractors. Keeping those decisions visible in the plan helps prevent a clean wellness space from becoming difficult to maintain.
- Resolve delivery and maintenance access. Trace the equipment’s path from the delivery point to the room, including doors, turns, stairs, and any specialized delivery equipment that may be needed. Leave enough practical access for inspection, water care, repairs, and eventual replacement. Installation support may include site evaluation, delivery coordination, initial water preparation, customer training, and follow-up, depending on the product and project scope. Review service and installation support before finalizing the layout.
- Confirm inspection and the complete scope. Before work begins, ask who coordinates site preparation, electrical and plumbing connections, inspections, and closeout. Request a transparent proposal that clearly identifies product, installation, site preparation, and electrical work rather than leaving infrastructure as an assumption. Fun Outdoor Living describes this coordinated approach as part of its integrated service model. Local authorities or qualified contractors should confirm any project-specific inspection or permitting requirements.
This sequence keeps the visible design connected to the work behind the walls and beneath the floor. It also gives you a clearer basis for comparing proposals, asking useful questions, and planning for service long after the first workout.
Which Sauna and Cold Plunge Choices Fit an Indoor Gym?
The best equipment choice depends less on a feature checklist than on how you expect to move through the room. In a home gym with sauna and cold plunge, the sauna should support the way you train. While the plunge should fit the space, utilities, and maintenance routine you can manage consistently. Think about access, circulation, ventilation, service clearances, and the transition from exercise to heat or cold before selecting a model.
Tylo offers traditional, infrared, and hybrid sauna models, giving homeowners several ways to match heat experience and room planning. A traditional sauna may suit someone who values a familiar heated-room ritual. Infrared can be worth considering when the desired routine and room arrangement differ from a traditional sauna setup. A hybrid model may offer more flexibility for a household with varied preferences. You can compare sauna types for home use before deciding which approach fits the room and the people using it.
| Choice | What to consider | Best planning question |
|---|---|---|
| Traditional sauna | Plan for the sauna environment, moisture relationship, ventilation, electrical coordination, and comfortable entry from the gym. | Can the room support the heat and transition needs without disrupting circulation? |
| Infrared sauna | Consider how its intended use, placement, power needs, and access fit the household’s regular routine. | Will the location make short, convenient sessions easy to use? |
| Hybrid sauna | Evaluate the added flexibility alongside ventilation, controls, service access, and the preferences of different users. | Does the flexibility justify the space and coordination required? |
| Vigor cold plunge | Vigor is described by the customer knowledge base as a self-chilling cold plunge system. Plan for water management, drainage, electrical coordination, access, and service. | Can users reach it safely, and can the system be maintained without blocking the workout area? |
A self-chilling system such as the Vigor cold plunge can simplify the routine by providing an integrated cooling system, but it still needs thoughtful placement and project-specific utility review. Avoid treating the plunge as movable gym furniture. Its location affects wet-foot traffic, drainage, nearby materials, and access for maintenance.
Finally, choose for the routine you are likely to keep. A compact, accessible setup may serve the household better than a more complex arrangement that feels difficult to enter, clean, or service. Product selection and room design should be reviewed together, with electrical, plumbing, ventilation, structural, and local code requirements confirmed by qualified professionals.
How Can You Build a Comfortable Exercise-to-Recovery Routine?
The most useful routine is one you can follow consistently without rushing between equipment or treating recovery like a test of endurance. In a home gym with sauna and cold plunge, begin with the workout that fits your normal schedule. Then create a calm transition before deciding whether heat, cold, or simple rest makes sense that day. A sauna and cold plunge routine may support relaxation and recovery for some people, but it is not a guaranteed medical or performance treatment.
Start conservatively, especially when you are new to either experience. Allow your breathing and heart rate to settle after exercise, drink water, and pay attention to how your body feels before entering a sauna or cold plunge. You do not need to use both every time. The goal is a repeatable rhythm that respects personal tolerance, current fatigue, and the conditions of the room.
Build in a dry transition
A practical sequence moves from the workout area to a clear transition zone, then to the thermal equipment and a dry recovery area. Keep a towel, water, robe, and comfortable place to sit within easy reach. Dry flooring and an uncluttered path can make the change between activities feel more natural and help prevent hurried steps around wet surfaces.
- Finish exercise and let your breathing settle before choosing the next step.
- Hydrate before and after heat or cold exposure, following your own needs and product guidance.
- Use shorter, easier sessions at first, then adjust gradually based on comfort.
- Stop if you feel unwell, dizzy, unusually chilled, overheated, or unable to recover comfortably.
- Leave enough time to dry off, change clothes, and return to a normal temperature before moving on.
Let personal guidance shape the routine
Manufacturers provide operating and care instructions for each sauna and plunge system. Those instructions should guide setup and use. Personal health circumstances also matter. If you have a medical condition, take medication, are pregnant, or are unsure whether heat or cold exposure is appropriate. Ask a qualified healthcare professional for individual advice before building the routine around it. This article offers planning guidance, not medical direction.
For more ideas on sequencing and pacing, see Fun Outdoor Living’s sauna and cold plunge routine guide. The best indoor setup supports an unhurried transition, so the space works with your habits rather than asking you to force a demanding schedule.
When Should You Bring in a Professional Designer?
Professional design help is worthwhile before you purchase equipment or begin construction. Especially when a home gym with sauna and cold plunge will share space with existing electrical, plumbing, ventilation, or drainage systems. An early review can reveal constraints that are difficult and expensive to correct after delivery. It also helps connect the space to the way your household actually exercises, cools down, changes, and recovers.
The first conversation should cover the site, not just the products. A designer can review access for delivery, the location of utilities, floor and wall conditions, moisture management, drainage, and the circulation between the workout area and recovery equipment. Site-specific electrical, plumbing, structural, ventilation, and building-code requirements still need confirmation by qualified contractors and local authorities where appropriate. But identifying those questions early keeps the project moving in the right order.
Look for coordination from planning through installation
A sauna and cold plunge affect more than the room where they sit. The plan should account for safe transitions, dry recovery space, service access, shutoffs, inspection, and future maintenance. Delivery also deserves attention. A clear route into the home, enough working space, and a realistic installation sequence can prevent last-minute changes.
Transparent scope is another reason to involve a professional. A useful proposal should explain the product, installation, site preparation, electrical coordination, and other known project components rather than leaving infrastructure costs as surprises. Ask who will coordinate the work, who will inspect the finished installation, and who you can contact when service is needed later.
Fun Outdoor Living brings design, installation, and service together for homeowners across North and South Carolina. Its regional showrooms, including the Charlotte/Pineville location, offer wellness displays and consultation areas with 3D design capabilities. For a site-specific starting point, a free home consultation can help clarify the layout, scope, and next decisions without committing you to an unsuitable setup.
Frequently Asked Questions
Can you use a sauna and cold plunge after a workout?
Many homeowners include both in an exercise-to-recovery routine, but the sequence and intensity should fit your experience, hydration, and comfort. Finish strenuous exercise, allow a clear transition, and use each system at a pace that feels manageable. If you have a medical condition or take medication that affects heat or circulation, ask a qualified medical professional for personal guidance. Do the same if you are unsure how your body may respond.
Is it okay to use a sauna and cold plunge every day?
Daily use is not automatically appropriate for everyone. Start conservatively, pay attention to symptoms such as dizziness or unusual discomfort, and allow recovery time when your body needs it. A comfortable, repeatable routine matters more than forcing a schedule. Personal health history, exercise intensity, hydration, and the specific equipment should all inform how often you use the space.
What should an indoor sauna and cold plunge layout include?
Plan the room around a simple flow: workout area first, a clear transition zone next, then the sauna and cold plunge, followed by a dry recovery area. Include room to move safely, store towels and supplies, clean surfaces, and reach equipment for service. Ventilation, drainage, electrical, plumbing, structural needs, and local requirements must be reviewed for the specific home.
Do I need professional help to plan the utilities?
Professional review is valuable because an indoor wellness room combines exercise use with heat, water, moisture, and equipment loads. A qualified team can coordinate site preparation, electrical and plumbing connections, drainage, ventilation, access for installation, and final inspections. Confirm project-specific requirements with qualified contractors and local authorities where appropriate.
Plan Your Home Wellness Space With Confidence
A well-planned indoor gym can make the transition from exercise to recovery feel natural, while giving ventilation, drainage, utilities, and service access the attention they deserve. A coordinated review helps you think through the space before equipment and finishes are selected.